How to use Things + Time
Here is a quick overview of our website's features and how to get started.
This is a guide to what you can do with the Things + Time platform, uploading your first 3D scan, adding annotations to your entry, and grouping entries into collections. Keep in mind that we are still in our Alpha phase and that some things might not work as well as they could. If you encounter any bugs, we would appreciate it if you could report them using our bug reporting form!
1. What You Can Do with the Things + Time platform
On the Things + Time Platform, you can:
- Upload your 3D scans
- Add archival information
- Annotate objects and environments
- Organize into collections
- Share and collaborate with other users
- Connect entries to each other
- Embed your archived entry externally
2. Navigating the Site
The following icons around the site will help you create your entry.
From the side bar on the right, you can:
 View Your Profile
 Create a new Entry
 Create a new Collection
At the bottom of an entry, you'll see all, or some of these icons, depending on the permissions the user has attributed to the entry.
 Download Entry
 Expand Preview to Full Screen
 Show/Hide Annotations
 Add to Favourites
 Embed Code
3. Creating an Entry
For more details, please visit the Getting started section of our FAQs.
Uploading your 3D Scan
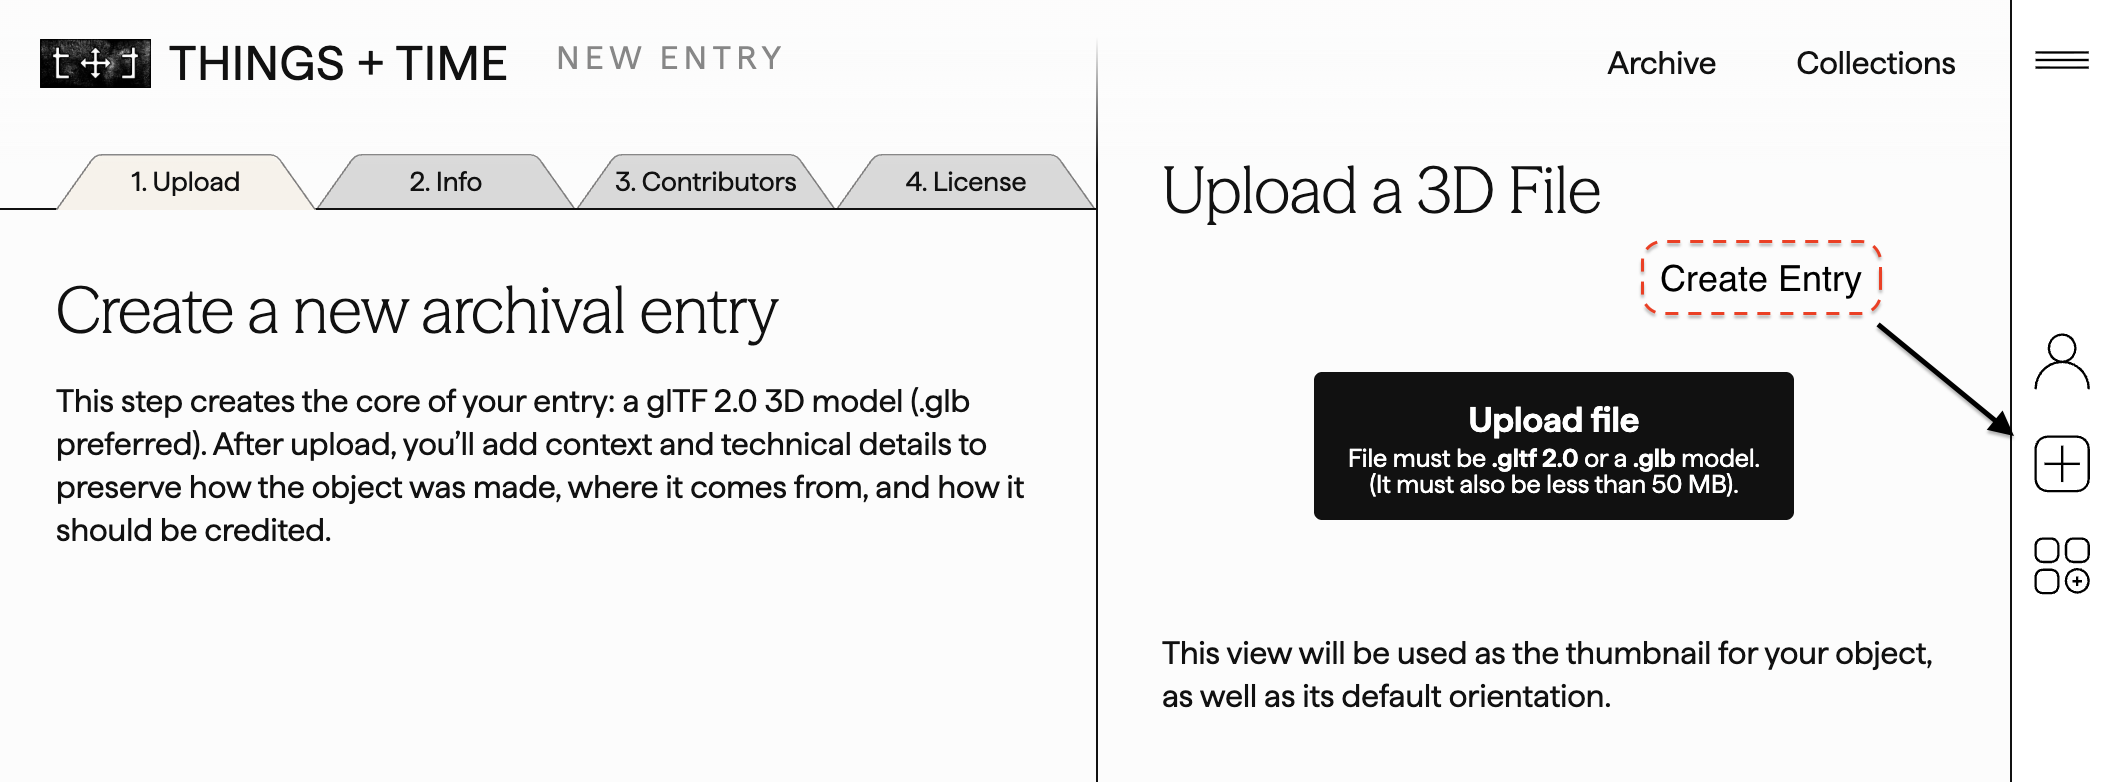
During upload, follow the following prompts:
- Step 1: Upload your object (glb file, 50mb size limit) and choose its orientation by clicking and dragging.
- Step 2: Add archival information which includes title, description, description for screen readers, date(s), materials, subjects, dimensions and custom fields when necessary.
- Step 3: Here you can choose the creator and contributors. There are custom fields to add multiple roles of contribution (such as photographer, designer, artist, etc.) Invite other users to edit and annotate to your entries.
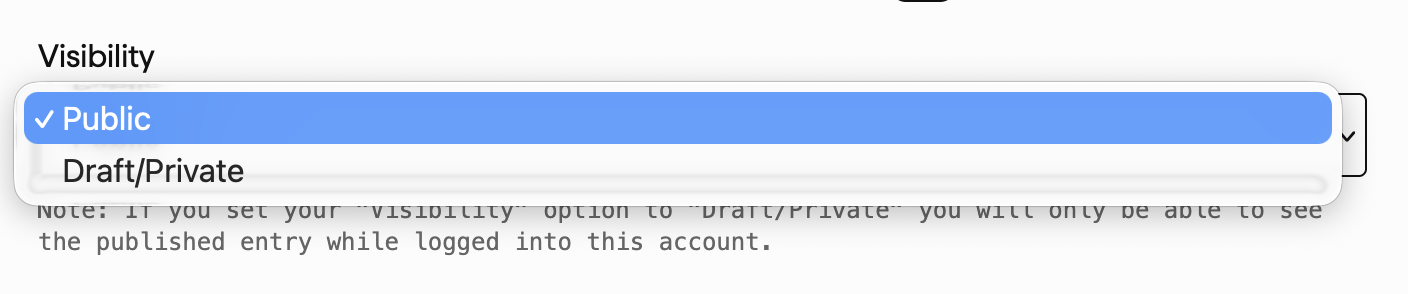
- Step 4: Here you can apply the license, visibility (Public, or Private/Draft), password protect your model and choose if your model can be downloaded and add it to collections. To learn more about copyright and licensing, visit the Licensing and Copyright section in the FAQ's.

Once you have finished Step 4, press 'Add Entry' to publish it ('Publicly' or 'Private/Draft' depending on which you selected).
Now you will be able to start adding multimedia annotations!
Annotating your objects and environments
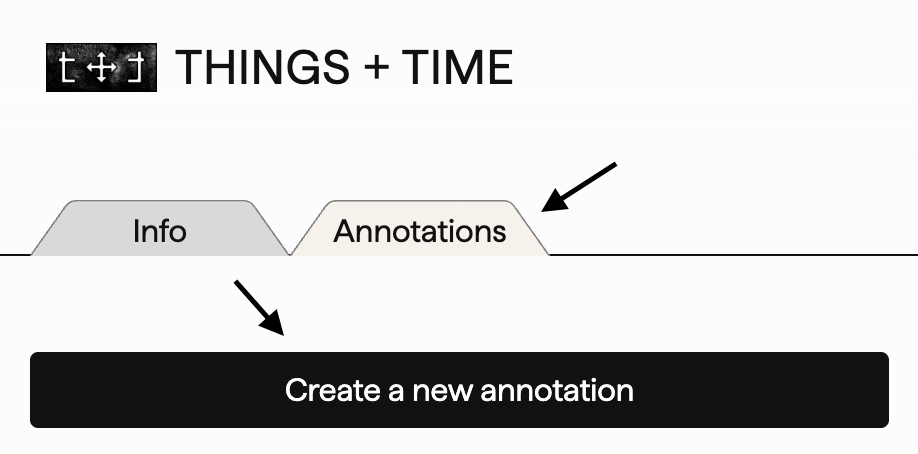
You can enrich entries with multimedia artifacts such as audio recordings, photographs and videos.
After creating you entry, go to the Annotations Tab:
- Go to your entry and click the “Annotations” tab
- Click the “Create a new annotation” button
- There, you can name, describe and upload annotations
- Place the annotation by clicking the spot you'd like it on your object. The coordinates of the position will show up as a nine digit number
- The link field allows you to link to another object on Things + Time as an annotation on your entry. At this time we do not support external links in this field.
- Annotations can be set to public or private
- The supported formats for annotations are .jpg, .jpeg, .png, .webp, .gif, .mp4, .webm, .ogg and .mp3. Annotations can be up to 10 MB each. Video annotations can be up to 50 MB each.
Organizing Entries into Collections
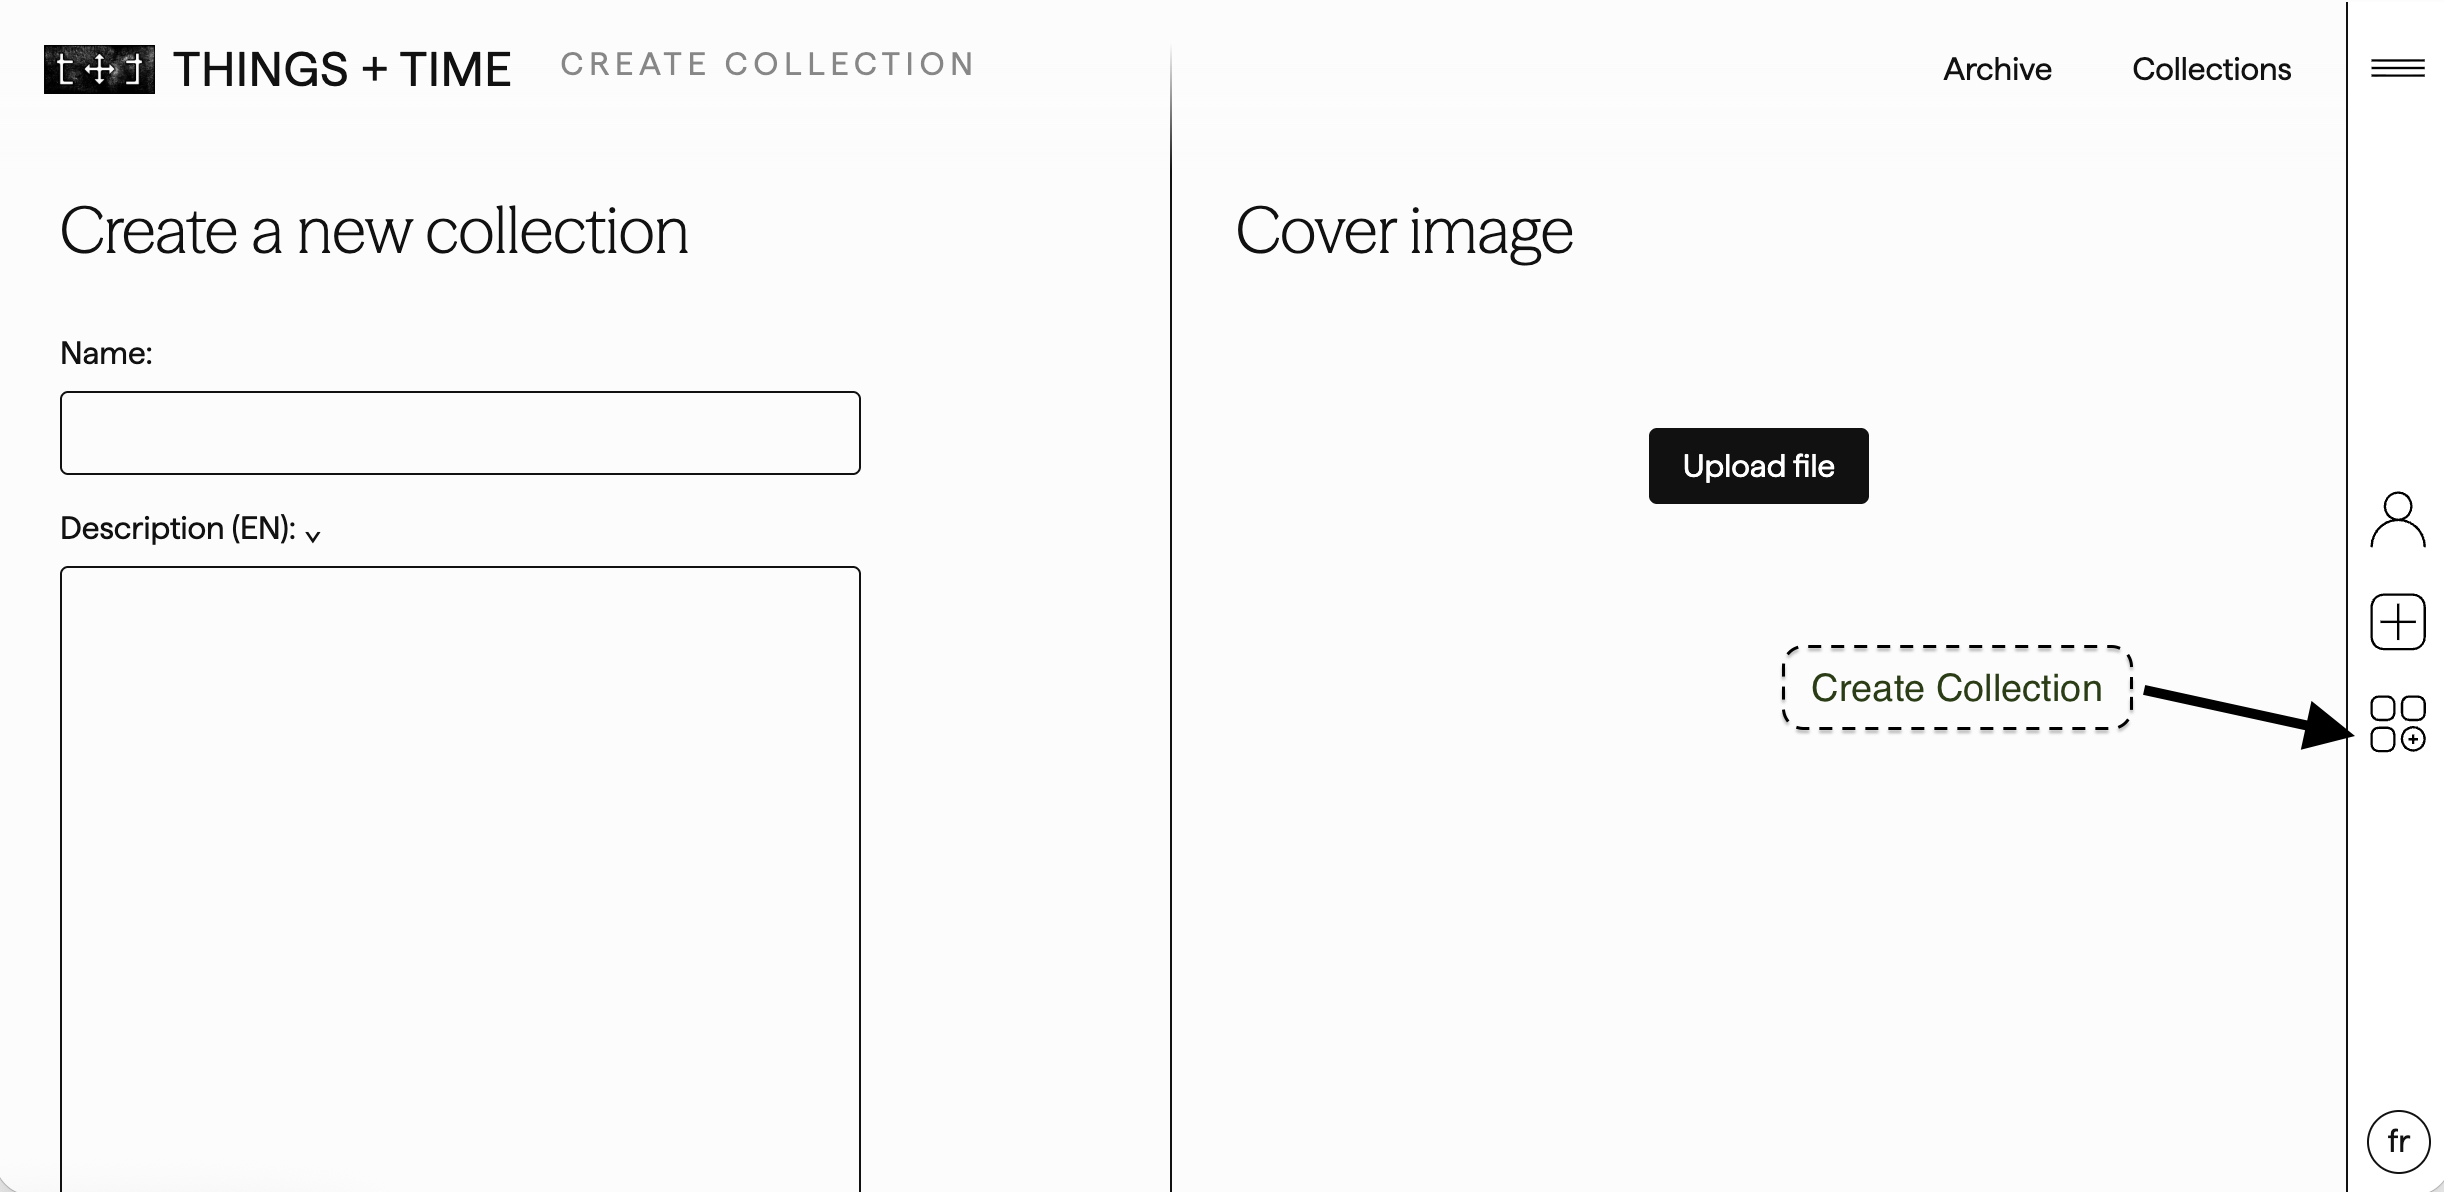
Group related entries into curated collections for storytelling, research, or documentation purposes.
Collections can be made before objects are uploaded, or you can organize objects once they have been uploaded.
To create a collection:
- Navigate to the side bar on the right, click on the collections icon
- Then you can name, and describe your collection, and upload a cover photo. Then you can choose the visibility and assign contributors to your collection.
- Your collections will show up in the collection tabs on your profile
- Public collections appear on the Things + Time Collection page
For more info on 3D scanning & uploading visit the Getting started section of our FAQ.